Tag Archives: LED

Netduino Plus 2 (NETMF) and WS2812 RGB LEDs

Some weeks ago I got some Adafruit NeoPixel, a compact RGB LED module. Each LED module has a WS2812 chip that only needs three wires: power, ground and data. The data protocol is self-clocking, at a rate of 800KHz. The LED modules can be chained to build longer LED stripes. (For more details see the Adafruit NeoPixel Überguide.)

Adafruit provides an Arduino library on github to control the LEDs, but there is no direct support for Microsoft .NET Microframework (NETMF) controllers like the Netduino Plus 2 that I was going to use.

Actually, there is an advanced guide to use NETMF controllers with the WS2812 LEDs, but it requires a custom firmware, because it seems that the GPIO pins of most NETMF controllers are not fast enough to switch the signal at the needed rate (there is a timing needed in the range of 0.4μs to 0.8μs and some websites found out that the GPIO pins have a latency of 17μs). As I nearly bricked a Netduino before, I didn’t want to dive into custom firmwares at this point.

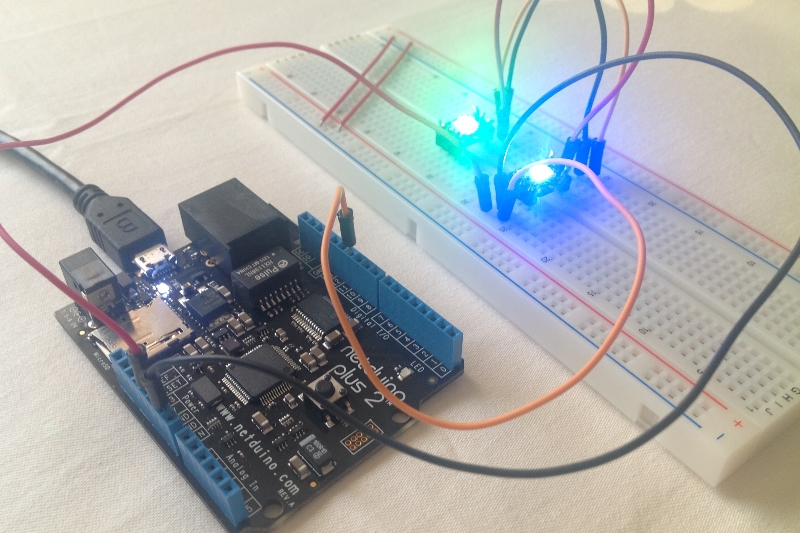
So I found a different way to send the control codes to the LEDs at the needed speed as the following photo proves:

Netduino with WS2812 LEDs

How does it work?

I thought that there must be a faster way to get signals off a Netduino Plus 2 because it has an Ethernet port and SD card slot, and I suppose they need to be adressed faster than 17μs (I haven’t evaluated this, so maybe I’m wrong with that, but it led me in the right direction). Looking at the ports that the Netduino provides my attention was drawn towards the SPI interface.

SPI (Serial Peripheral Interface) is a four-wire master-slave interface for full-duplex communication between chipsets. It has a clock wire (SCLK), output (MOSI) and input (MISO). Normally it can be used at a frequency up to some MHz, so the ports must be really fast.

My assumtion was, that I could only use the output (MOSI) pin, configure the frequency accordingly and send the needed control bytes on that wire to the LEDs. I tried some settings and data packets, but first without any success, but luckily I wasn’t the first one to try this, so I found some code snippets for different microcontrollers, that pointed me into the right direction, e.g. that a timing of 6.666MHz is recommended.

I’ve written two classes and uploaded them to github, so if you have a Netduino Plus 2 (or similar microcontroller) and don’t want to use a custom firmware to control WS2812 RGB LEDs, then maybe you want to give my code a try.

Code on github: https://github.com/jcoder/NetMFNeoPixelSPI

Usage example:

NeoPixelSPI neoPixel = new NeoPixelSPI(Pins.GPIO_PIN_D10, SPI.SPI_module.SPI1);
Pixel pixelRed = new Pixel(255, 0, 0);
Pixel pixelGreen = new Pixel(0, 255, 0);
Pixel pixelBlue = new Pixel(0, 0, 255);
Pixel pixelWhite = new Pixel(255, 255, 255);
Pixel[] block1 = new Pixel[] { pixelRed, pixelWhite };
Pixel[] block2 = new Pixel[] { pixelBlue, pixelGreen };
int waittime = 1000;
while (true)
{
 neoPixel.ShowPixels(block1);
 Thread.Sleep(waittime);
 neoPixel.ShowPixels(block2);
 Thread.Sleep(waittime);
}

The library code is not optimized (yet), and I didn’t write a helper class for easier handling of long LED stripes (because I don’t own one), so feel free to extend the code. I’m not quite sure if this approach is really a good one, but it worked for me.

Also feel free to leave a comment below if you have any remarks, ideas, etc.

As always: use this information and the code on your own risk. ;)

ATtiny45 meets 74HC595

Earlier today I’ve been following the Arduino Tutorial for driving a 74HC595 shift register which turned out to work pretty well.

In short, a shift register is an electronical component that can be controlled using 3 wires to change the output of 8 pins, or even more when two or more shift registers are chained together. Using a shift register can be useful when you need some more output pins on a microcontroller but only want to use few pins on the microcontroller itself.

I really suggest taking a look at the linked tutorial above for more information, everything worked great following the steps described there.

Limited number of pins on a microcontroller? Did anybody say “ATtiny”?!

Yes, there we go:

It is pretty straight forward to port the Arduino example code for controlling a shift register to work with an ATtiny45 as well.

  • Upload the ArduinoISP sketch to the Arduino Uno
  • Load the Shift Register sketch into the Arduino IDE
  • Switch the board settings to ATtiny45
  • Connect the ATtiny45 to the Arduino Uno (see my previous posting for more infos)
  • Upload the sketch through the Adruino Uno to the ATtiny

As you can see in the photo above, the Arduino is only used as a power source, the shift register – lighting the LEDs – is just driven by the ATtiny45 on the small breadboard.

I’ve been using a very simple blinking pattern which I set up in the code in an array of bytes (can you guess the pattern? shouldn’t be too hard due to the LED setup), and the program is about 1084 bytes in size. As the ATtiny45 comes with 4096 bytes of program memory there is still a decent amount of space left to build a more complex program, because I guess most of the code is used by the “invisible” part of your program (not the directly written user code but the “infrastructure” code to make it run on the chip) – but that’s just a guess ;)

Anyway, shift registers are a powerful “tool” which is easy to use because the Arduino comes with both predefined functions to work with shift registers and also useful examples, so depending on your project needs you might want to give the shift registers a try.

First steps with the ATtiny 45

The ATMEL ATtiny 45 is an 8-bit programmable microcontroller chip. Some weeks ago I stumbled upon this How-To article by Matt from MAKE about the ATtiny 45 and with my last electronics order I got one (actually two, just in case I accidentially blew one up).

Yesterday I took the time and got it up and running:

Following the tutorial at the MIT Media Lab page it took no longer than 30 minutes to make the microcontroller drive two LEDs.

Although the tutorial was very helpful some things have changed in the current software versions, so (as promised in my last blog posting) this is what I did differently:

1. Copying the ATTiny files

  • doing so as described in the tutorial
  • but: they are showing up as simple devices under “Tools”, “Board”

2. Preparing the Arduino Uno

  • connect the Arduino Uno via USB to the PC
  • start the Arduion IDE 1.0.1
  • open “ArduinoISP” from “File”, “Examples”
  • upload it to the Arduino Uno
  • when finished, connect Arduino Uno to ATtiny on its breadboard, see tutorial for details

3. You(r) program

  • open the blinking example, change pin 0
  • select “Tools”, “Programmer”, “Arduino as ISP”
  • upload program using “File”, “Upload Using Programmer”

4. Done

  • depending on your program and breadboard setup, the LED(s) should be blinking now

What’s next?
I’m not quite sure, but I think the ATtiny 45 is a cool chip, so I’m really looking forward to finding a good way to integrate it into upcoming projects.

Links
ATMEL ATtiny 45 http://www.atmel.com/devices/attiny45.aspx
MAKE article http://blog.makezine.com/2011/10/10/how-to-shrinkify-your-arduino-projects/
MIT Media Lab page ATtiny http://hlt.media.mit.edu/?p=1695
My ATtiny 45 video at YouTube http://youtu.be/Jv3yjzZJJ2c

Leaving the FEZ comfort zone – say hello to the breadboard

I’ve been very busy over the last weeks, but now I’ve taken some time to get deeper into the “core electronics part”, which simply means that I got a breadboard and some electronic components like resistors, transistors, LEDs and a lot of wires.

The first step was to get a normal LED on the breadboard blinking by connecting it directly to the Digital IO ports on the FEZ Panda board. Sounds easy but I did not want to break anything so after carefully reading some postings about the topic I connected die Digital IO port to a 220 Ohm resistor which was connected to the LED and then back to Ground. Using the OutputPort class on the given IO port the LED was blinking. That easy :)

As it was not as complicated as I thought it would be, I remembered the 2×24 LCD panel that I got from a friend. I wasn’t sure how it exactly works, but as I found out it has a HD44780 controller on-board that accepts 4-bit commands using additional wires for signals and power. And there is even a very useful C# class at the GHI Electronics website, nearly ready to use.

And guess what? After connecting the wires and including the pre-defined class I got the LCD working! Awesome!

I actually had to de-wire everything to put it back in the boxes for storage, but it’s not as hard as I thought to put everything together, so manybe I’ll use the LCD in some of the next projects.

And the next part of equipment is waiting: I just soldered the needed connectors to a 4×7 segment LED element, so stay tuned ;)